Please try searching something.
Manage Accounts
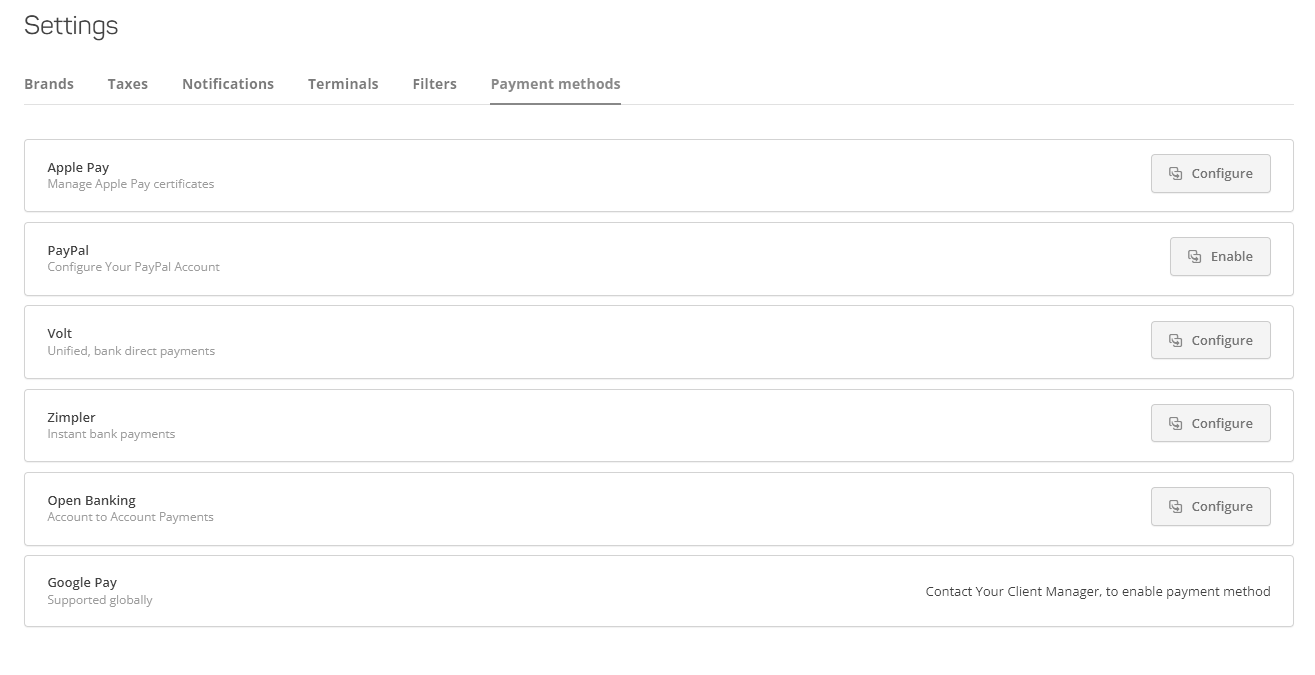
Enable Alternative Payment Methods
In Payment Methods, you can configure and enable Payment Methods that are available to you. Learn more about Payment Methods here.
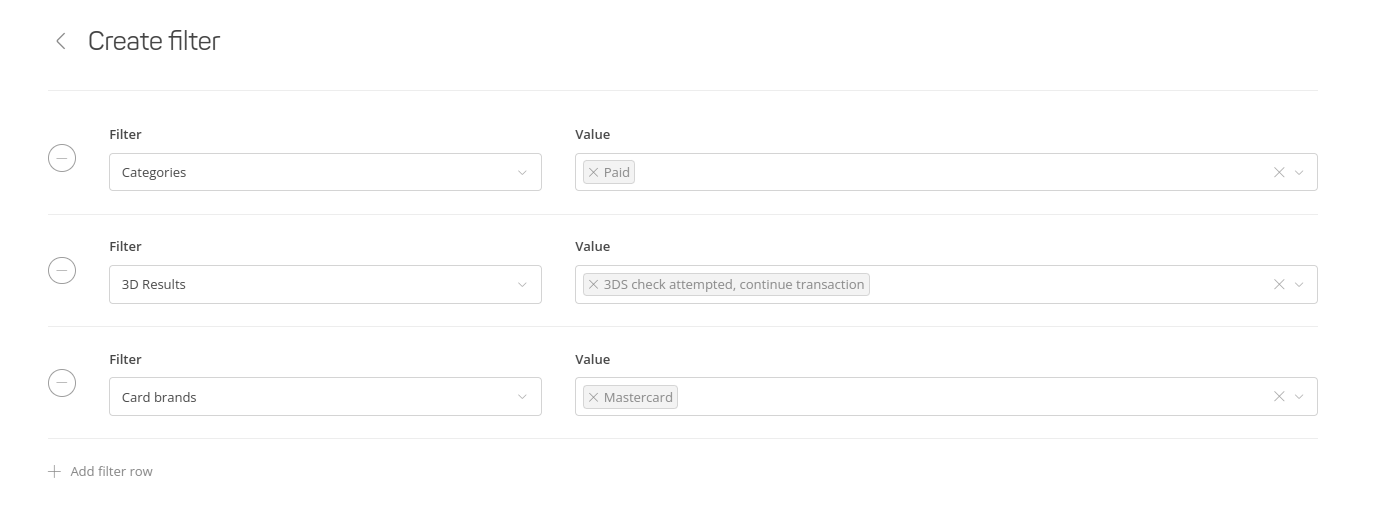
Create a Custom Filter
To create a custom filter, go to Settings, choose Filters tab.

Click on on + Create Filter button. You can add several categories with specified values. After saving a custom made filter, you can edit it later, if needed.
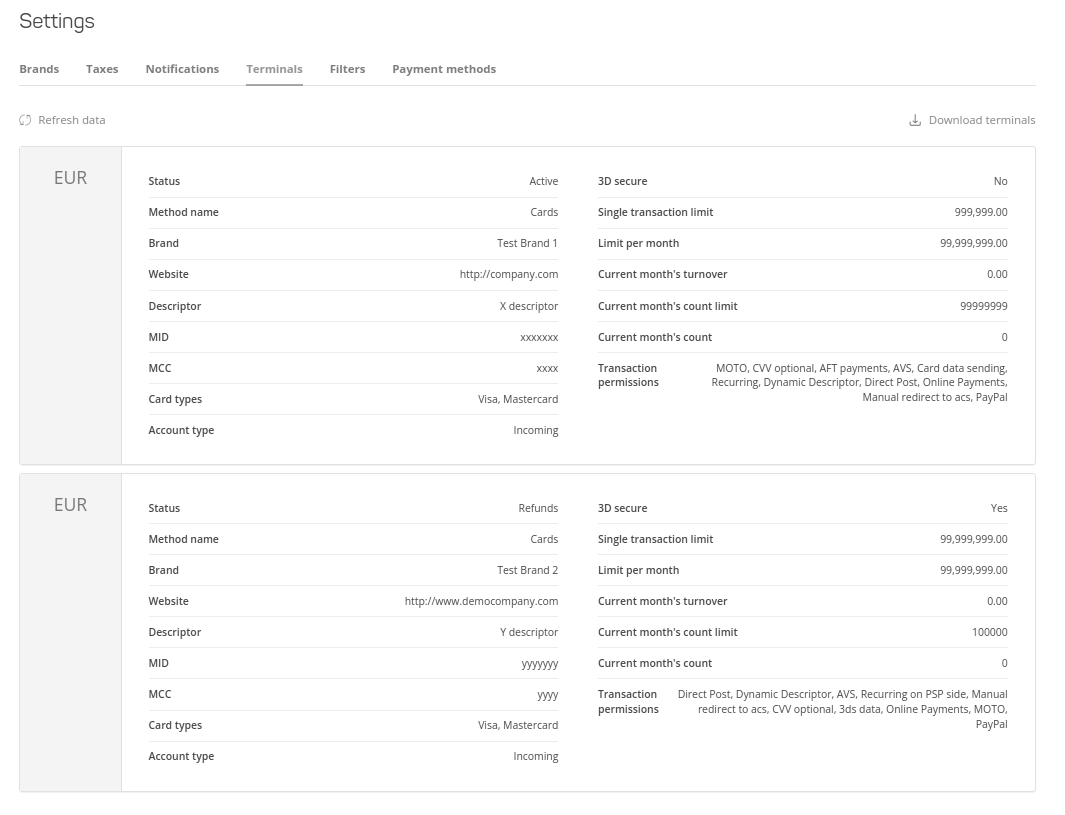
Download Account Lists
To downloand an Account List, go to Settings and select "Terminals" tab. There you can click on the "Download terminals" and you will be asked to select either a .CSV or .XLSX file format.
Create a Team Account
To add a new user to your account, click on the + Add User button. You will then be asked to provide:
- Basic information about the new user;
- Product permissions:
- Access to all Merchant Portal sections (Analytics, Timeline, Invoices, etc.);
- Acess to viewing and exporting user data and activity in Timeline, Clients, and Products;
- Management permissions.

To edit an existing user, click on it from the list. Now you can:
- Change the basic information about the user;
- Change the user permissions;
- Block the user (once blocked, the user loses all their access permissions).
Create and Manage Clients
To add a new user to your account, click on the + Add Client button. You will then be asked to provide:
- basic information (email address, phone number, and emails used for CC);
- personal details (first name, last name, personal code);
- the company details (brand, legal name, registration number, VAT number, country, country code, city, street, state, and ZIP code);
- bank details (account, code).
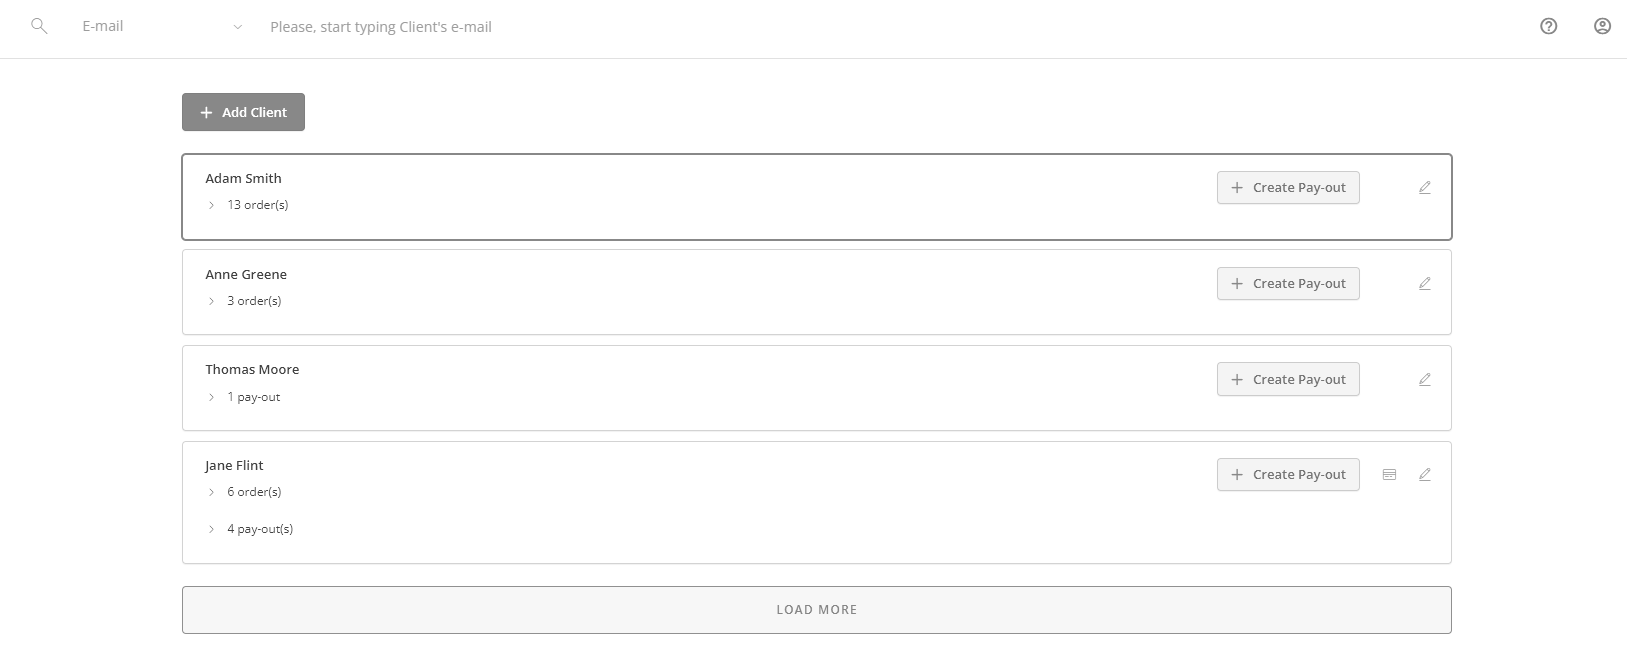
To edit an existing client, click on it from the list. Now you can:
- Change the basic information, personal details, company details, and bank details about the customer;
- Delete this customer.
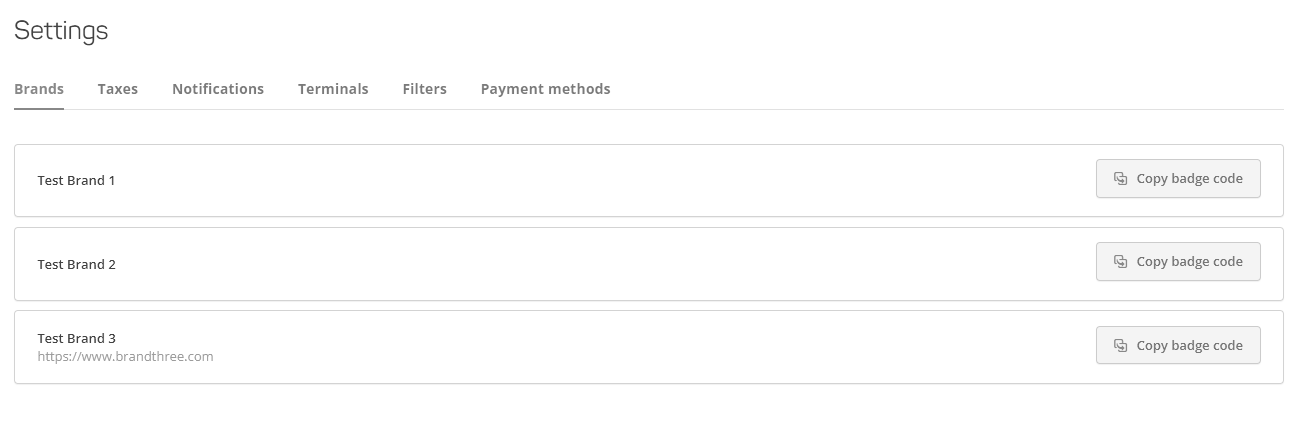
Customize Your Brand
Go to Settings and select the Brands tab to edit the brand information. It will allow you to view and edit:
- General Settings:
- Brand name (used for invoices);
- Logo (used for invoices);
- Support email;
- Phone number;
- Website (NB: this field cannot be edited as it set by your account manager);
- SMS sender name (used for invoices);
- Default terminal;
- Default allowed attempts;
- Default currency (will be set as default for new products);
- Default details requested (requested customer data for invoices);
- Time zone
- Payment Settings:
- Badge code: copy the badge code to display the information on the compliance of transactions via Cardaq to international payment systems on the user’s site page;
- Skip capture: when activated (i.e. when the button is blue), money for the invoice payment will be captured from the customer’s account and not transferred to the user’s account automatically, so the user can either manually transfer the captured amount to their account or return it to the customer. Hold status will be displayed for the invoice on Timeline in this scenario. When inactive (i.e. grey button), money for the invoice payment is automatically transferred to the user’s account. Paid status will be displayed for the invoice on Timeline in this scenario;
- Strict overdue: when activated (i.e. blue button), the invoice cannot be paid past its deadline (i.e. once the invoice status becomes Expired). When inactive (i.e. grey button), the invoice can be paid past its deadline (i.e. once the invoice status becomes Overdue);
- Number order using “#”: when activated, output order numbers are shown in Timeline and reports with a prepended hash #;
- Reverse downgraded payments: when activated, allows to automatically execute a reversal for authorizations identified as downgraded from 3D Secure to non-3D Secure by the card scheme;
- Automatic product generation: when activated, allows to automatically create and save a new product object for later use